


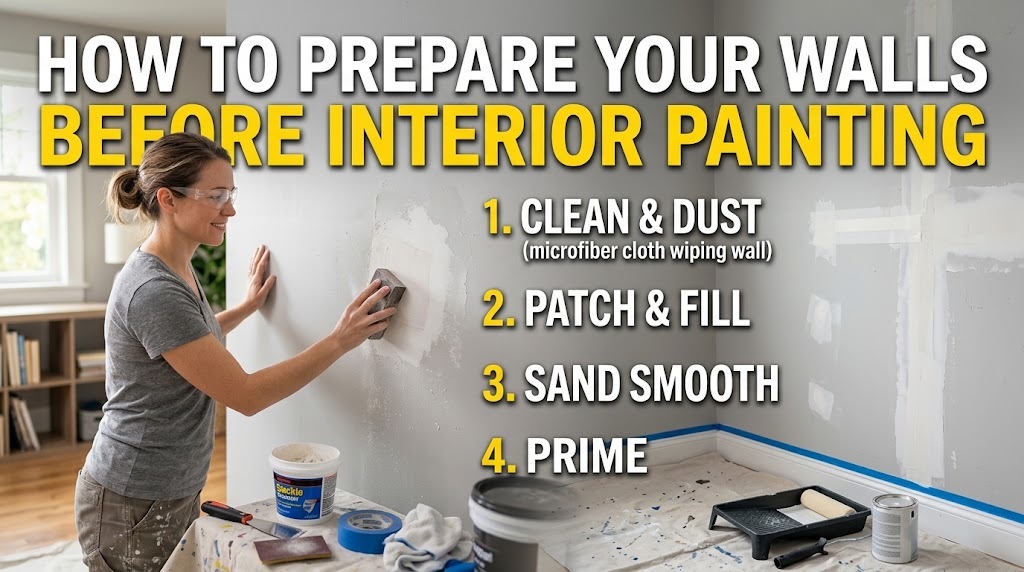

Preparing your walls properly before applying paint is one of the most important steps in achieving a clean, even, and attractive interior finish. Paint can only perform as well as the surface underneath it, so cleaning, repairing, sanding, and priming should not be treated as optional preparation tasks. Whether you are refreshing one room or preparing an entire property, careful wall preparation can help prevent visible imperfections and create a more consistent result.
If you are working with an Interior and exterior painting company in Sparkill, it is still useful to understand what proper preparation involves. Knowing how walls should be prepared helps homeowners communicate their expectations clearly and recognize why professional painters may spend considerable time preparing a room before opening a paint can.
Why Wall Preparation Matters Before Painting
A freshly painted wall can highlight imperfections that were barely noticeable before. Small nail holes, dents, cracks, grease marks, dust, peeling paint, and uneven areas may become more visible once a new coat of paint is applied. Painting directly over these problems does not necessarily make them disappear.
Proper preparation creates a cleaner surface for primer and paint to adhere to. It also gives the finished coating a more uniform appearance. The amount of preparation required depends on the wall’s current condition, the existing paint, the type of surface, and the new coating being applied.
For example, a recently painted wall in good condition may only need cleaning and minor sanding, while an older wall with multiple layers of paint, cracks, stains, or damaged drywall may require substantially more preparation.
Step 1: Inspect the Walls Carefully
Before cleaning or repairing anything, inspect the entire surface. Look at the walls from different angles and under good lighting. Pay attention to areas around doors, windows, corners, baseboards, electrical outlets, and frequently touched surfaces.
Check for:
- Nail holes and screw holes
- Small dents and scratches
- Cracks
- Peeling or flaking paint
- Water stains or discoloration
- Grease and dirt
- Mold or mildew concerns
- Loose wallpaper or adhesive
- Rough or uneven areas
Inspection is important because the appropriate preparation method depends on what you find. A small nail hole can usually be handled differently from a larger crack or a wall with widespread moisture damage.
Pay Attention to Cracks and Moisture
Not every crack should simply be filled and painted. Hairline surface imperfections can have a different cause from larger or recurring cracks. Likewise, stains caused by previous leaks may return if the underlying moisture problem has not been resolved.
If you notice significant cracking, active moisture, persistent dampness, or suspected mold, address the underlying issue before proceeding with cosmetic painting work.
Step 2: Remove Dust and Dirt
Paint adheres best to a reasonably clean surface. Dust and dirt can interfere with adhesion and may also become trapped beneath the new coating.
Start by removing loose dust from the walls using an appropriate dry cleaning method. For washable painted surfaces, use a suitable mild cleaning solution and a soft sponge or cloth. Avoid saturating drywall, particularly around damaged areas or seams.
Kitchens and other high-use areas may require more cleaning because cooking residue, grease, and everyday buildup can accumulate on walls. Bathrooms can also require careful cleaning because humidity and residue may affect the surface.
Allow the walls to dry completely before moving on to repairs or painting.
Step 3: Remove Loose or Peeling Paint
If existing paint is peeling, bubbling, cracking, or flaking, it should not simply be covered with new paint. Loose material can continue separating from the wall and may leave an uneven appearance beneath the new coating.
Carefully remove loose paint using appropriate tools and techniques. Once unstable material has been removed, examine the exposed surface. It may require filling, sanding, or priming before painting.
The goal is not necessarily to remove every bit of existing paint. Instead, the objective is to create a stable and reasonably uniform surface suitable for the new coating.
Step 4: Repair Holes, Dents, and Small Imperfections
Small wall imperfections are common, especially in homes where pictures, shelves, mirrors, and other fixtures have been installed over time.
Fill appropriate nail holes, screw holes, dents, and minor surface damage with a suitable patching compound. Apply the material according to the product instructions and avoid creating an unnecessarily thick patch.
Once the repair has dried, lightly sand the area so that it transitions smoothly into the surrounding wall. Run your hand gently across the repaired section to check for noticeable ridges or depressions.
For larger drywall damage, damaged seams, or significant cracks, more extensive repair may be necessary. Trying to conceal substantial structural or surface problems with paint alone can produce disappointing results.
Step 5: Sand Rough Areas Smooth
Sanding is primarily about creating a smoother, more uniform surface rather than aggressively removing the wall underneath. Focus on areas where old paint edges, repairs, rough patches, or minor surface irregularities are present.
Use an appropriate sanding method for the wall and existing coating. Avoid excessive sanding that could damage drywall paper or create unnecessary depressions.
After sanding, remove the resulting dust before priming or painting. Dust left behind can interfere with the finish and may create unwanted texture.
Step 6: Clean the Wall Again After Repairs
Wall preparation often creates additional dust and debris. After sanding and repairing, clean the surface again so that loose particles do not remain behind.
This second cleaning step is easy to overlook, but it can make the painting process more controlled. The wall should be dry, clean, stable, and free from loose debris before primer or paint is applied.
Step 7: Decide Whether Primer Is Needed
Primer is not automatically required for every painting project, but it can be useful in several situations. The need for primer depends on the condition and type of surface, the existing color, the type of new paint, and the repairs performed.
Primer may be particularly helpful when:
- The wall has extensive repaired areas.
- The surface is porous or uneven in absorption.
- A major color change is being made.
- Stains require appropriate preparation.
- Bare drywall or other previously unpainted surfaces are present.
- The existing surface has adhesion or compatibility considerations.
A properly selected primer can help create a more uniform base for the finish coats. However, product instructions should always be followed because different primers and paints have different preparation requirements.
Step 8: Protect Trim, Floors, and Fixtures
Good wall preparation also includes protecting everything that should not receive paint. Move furniture away from the work area where possible and cover floors and remaining furnishings with appropriate protective materials.
Use suitable painter’s tape where necessary around trim, frames, and other boundaries. Remove or protect switch plates and outlet covers rather than relying on paint to work around them.
Taking time to prepare the room can make the actual painting process cleaner and reduce accidental splatters or unwanted paint lines.
Preparing Different Types of Walls
Not every wall requires the same approach. Previously painted drywall, fresh drywall, plaster, textured surfaces, and walls with wallpaper remnants can all require different preparation methods.
Previously Painted Drywall
If the existing coating is sound, the wall may only need cleaning, light surface preparation, minor repairs, and possibly spot priming. Areas with peeling paint or visible damage require additional attention.
New Drywall
New drywall is porous and usually requires appropriate preparation before finish paint. Joint compound and drywall surfaces can absorb paint differently, so proper priming helps create a more consistent base.
Plaster Walls
Older plaster surfaces may contain cracks, uneven areas, or previous repairs. Inspect carefully and use preparation techniques appropriate for the condition of the plaster rather than treating it exactly like modern drywall.
Walls With Wallpaper
Wallpaper and adhesive residue require special consideration. Painting over poorly prepared wallpaper or adhesive can lead to bubbling, texture differences, or adhesion problems. In some cases, removal and additional surface preparation may be necessary.
Consider the Room Before Choosing Your Preparation Method
The room itself can influence preparation requirements. A kitchen may need more thorough degreasing than a bedroom. A bathroom may require closer attention to moisture-related conditions. High-traffic hallways may contain more scuffs and surface wear than less frequently used rooms.
This is also where local conditions can matter. Homeowners comparing an Interior and exterior painting company in Kaser should consider whether the contractor understands the property’s specific surfaces, existing conditions, and preparation requirements rather than choosing a service based only on the promise of a quick repaint.
The same principle applies when comparing painters in Sparkill, painters in Kaser, or other local contractors. A quality painting project begins with an accurate assessment of the surface and a preparation plan suited to the property.
Common Wall Preparation Mistakes to Avoid
One of the most common mistakes is rushing directly to painting without inspecting the surface. Even high-quality paint cannot reliably hide significant dents, peeling coatings, or poorly repaired areas.
Another mistake is painting over dust, grease, or loose material. These contaminants can affect the appearance and performance of the new coating.
Skipping adequate drying time is another problem. Cleaning solutions, patching compounds, primers, and other preparation materials may need to dry fully before the next stage. Applying another product too soon can interfere with the result.
It is also important not to ignore the source of recurring damage. If a wall continues to develop stains, peeling, or cracks, repainting the surface without investigating the cause may only provide a temporary cosmetic improvement.
When Should You Hire a Professional Painter?
DIY wall preparation can be practical for small projects when the walls are in good condition and the homeowner has the necessary tools and time. Professional assistance may become more useful when the project involves extensive repairs, multiple rooms, difficult surfaces, high ceilings, significant peeling, or complicated preparation requirements.
A professional contractor can evaluate the condition of the surfaces and determine what preparation steps are appropriate before painting begins. Homeowners should also ask contractors what preparation is included in the proposed project so that expectations are clear from the beginning.
When evaluating house painting services in Sparkill or house painting services in Kaser, consider the contractor’s approach to preparation, surface protection, repairs, cleanup, and communication not simply the paint color or final coat.
Final Wall Preparation Checklist
Before painting begins, walk through the room one final time. The walls should be clean and dry, loose paint should be removed, holes and minor imperfections should be repaired, rough areas should be smoothed, and dust should be cleared away. Any necessary primer should be selected based on the surface and coating requirements.
The surrounding floor, furniture, trim, fixtures, and other areas should also be adequately protected. Taking a few extra minutes for this final inspection can help identify problems before they become visible beneath the finished paint.
Conclusion
Preparing walls before interior painting is about much more than cleaning the surface. Careful inspection, cleaning, repairs, sanding, dust removal, appropriate priming, and room protection all contribute to a more consistent and professional-looking result. The right preparation also helps prevent small surface problems from becoming more noticeable after painting. Whether you handle the preparation yourself or work with a professional contractor, taking the time to prepare the walls properly is one of the smartest steps you can take before starting an interior painting project. For homeowners who want to discuss their painting project and preparation needs, JLL Paintings can be considered as part of the process of planning the work. A well-prepared surface provides a stronger starting point for a clean, attractive, and satisfying finished space.